Old Soldier's Guide for Newbie Chuggers
Admin Note: Club Motorhome member 'Old Soldier' has kindly sent in the following.... which are extracts from email correspondence that he had with a friend who was new to motorhoming and had asked for help and advice in the early learning days. All I've done here is to compile these extracts into the format of an article which may be of great help to other new motorhomers.
Thank you Old Soldier!

Owning an expensive motorhome can be expensive!! The cost of fuel, servicing, repairs, additional equipment, insurance, tax, habitation checks, gas bottles, tyres, campsites, are all in addition to your daily living costs of food, places to visit, cloths etc etc. A fortune can be spent if what you want are expensive brand name services and equipment, there are cheaper alternatives that have worked for Les and I for years.
If you have the space then keeping the van at home on your drive can save a fortune in storage costs, It also gives you the opportunity to keep your eye on your van, you can keep equipment in the van that you also might want to use at home or in the garden, and it makes loading and unloading simple and easy.
CHARGING THE BATTERY at home
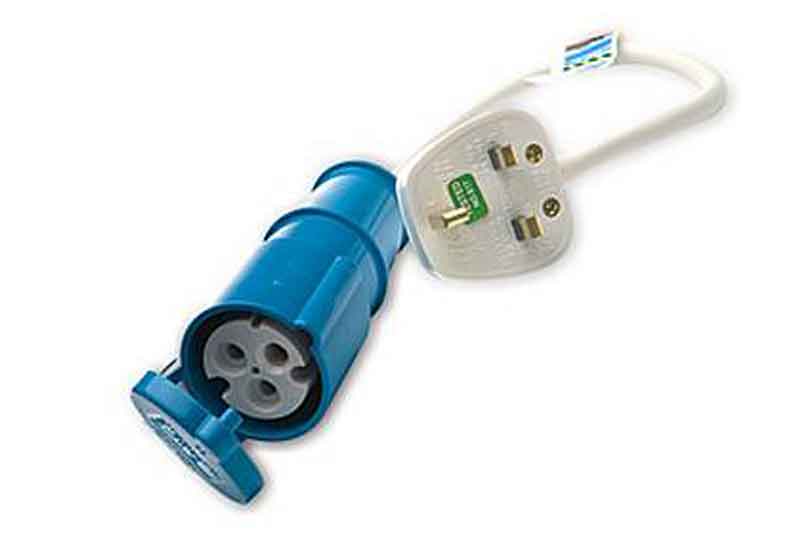
You can charge the van by getting a 16A / 13A plug adapter and plugging it into the garage when needed. Vans don't need to be on charge all the time, If nothing is switched on and draining the battery then it should only need an overnight charge once in awhile. Buying a small battery monitoring gizmo that is attached to the habitation battery will give you an audible warning if the battery power drops to a low level. Remember the vehicle battery is independent from the habitation battery. It might get charged at the same time as the habitation battery if you have the charging circuit switched correctly whilst the engine is running but it is not guaranteed that the vehicle battery gets charged from an external 240v supply or, if you have one a solar charging supply. Check it out.
Power supplies
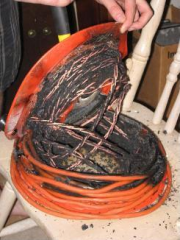
Most sites who have electrical hook up points have 16A. sockets. In some cases, like the Caravan Club sites those sockets need to be twisted clockwise once you have inserted your male end!! This "switches" on the supply. To release your plug then you press the red button first. Always connect your female end to your van before plugging in your plug to the supply point. (Safety). If your cable is on a spool or cable carrier it is important that you unwind the whole length and lay out the cable flat on the ground before use. Electrical heating devices ( Kettles, Ovens, Hairdryers, etc, use high amounts of power and this can cause heat to build up in tightly spiraled cables which can then ignite.
Most supplies in UK are tested and stable. Not so in much of Europe. Having an European adapter is essential but you should also take a polarity tester and polarity conversion cable. Many times abroad we have found the live and negative cables swapped round. Now with modern safety cutouts it's not a real danger, most 240v electrical items will work normally however it does mean that the van sockets will still be live even if you have switched them off. Potentially dangerous. We have also had a couple of CD players pack up because of it. For the sake of a few quid, be safe, carry a tester and a polarity changing adapter.
GREY WATER
Whilst on site, ensure you have a container so that you can empty your grey water tank without having to move the van every time. Some use a large waste master tank that can be wheeled about, I just use a bucket. that can also be used for washing the van and is also a fire bucket if needed. Most sites will have proper disposal facilities, may even have super pitches where you can connect a suitable pipe from your tank directly into a drain, but there are some smaller sites, CL's / CS's, farm sites etc that only have hedges and borders. Provided you are not putting anything nasty down the drains then it is not a problem.
It is always best to ensure your waste water tank is emptied when you leave a campsite, no point carrying waste water about, just adds to the weight you are carrying. If you are just driving between sites then that's all you need to do. However you will find that there is probably still some residue in the grey tank that did not drain out and you don't want it sitting there in the tank for days / weeks on end in storage or on your driveway. Although it is frowned on by some the trick is to drain all you can at the disposal area FIRST, then crack open the waste valve slightly so that you leave this relatively small amount of non toxic water behind you as you travel around bends and corners. Pick quiet roads and shut the valve as soon as the tank is completely empty. Leaving it in the tank can result in smelly drain smells!! If you have a sloping driveway at home it is useful for draining any residue out of the grey tank.
BLACK WATER
Black water is toilet water. Normally contained in a cassette stored under the WC. A few things to remember about using and emptying the loo. Firstly, don't try to remove the cassette without warning the other half!! If the valve in the loo ( trap) is open then the cassette cannot be moved so you will be pleased to know that you can't empty whilst someone is sitting on it!! However.... If the other half is in the bad habit of only opening the trap after using the loo it is theological that you could have removed the cassette with disastrous consequences....... leaving you with a real mess to clean up under the loo.!
You need to add chemicals to your empty toilet cassette, with a small amount of fresh water, so that the contents are broken down biologically. I have used all sorts over the years. Washing machine biological sachets can work ok but they don't tend to disguise the colour or smell too well! The best I got were dry powder sachets, bought from someone on eBay, 50 a time for £10. They had "For aircraft toilet use only" written on them. Suddenly they stopped being advertised so I guess whoever was nicking them at Heathrow was caught!! Whatever you get, make sure they are perfumed, it makes for a much nicer experience for everyone!!
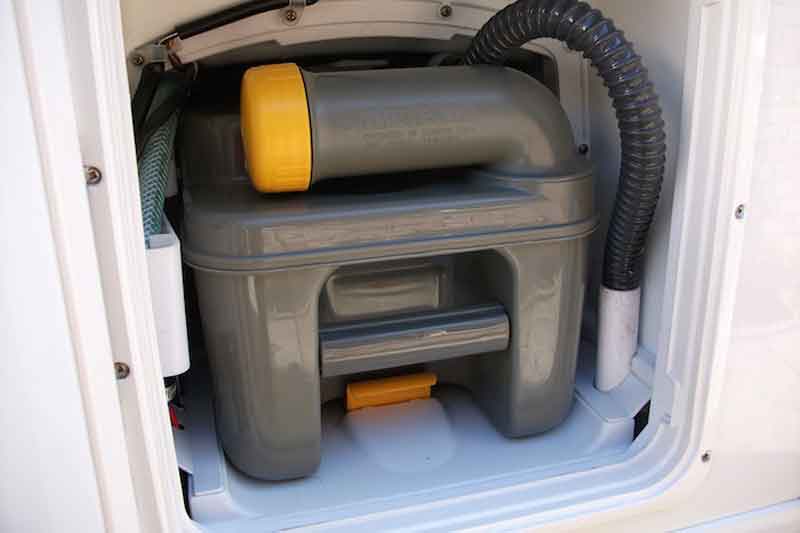
Your van may be fitted with a cassette that has wheels attached as well as a handle to pull it along. If not, then a small lightweight folding trolley unit can be a big help, particularly on large sites where the Chemical Waste Emptying Point (ELSAN) is located miles away!
The frequency of emptying both black and grey water will depend on usage. If on a campsite I always use the campsite facilities but Les prefers to use the van facilities, if wild camping then we find that we need to empty every couple of days or so. Of course us blokes can extend that if you are pitched up on your own with a few bushes around! (A wee one only of course!)
FRESH WATER
Some folk travel with a full tank, that's about 80 ltrs (or more) and at 1kilo per ltr, that's a lot of weight. My home water is on a meter so not only am I tight but for me I prefers to travel lighter and fill up on arrival provided water is available. I only carry about a quarter tank and, as I don't drink from the freshwater tank, I also have a couple of 4 pint ex milk containers of fresh water for drinks etc. Many people with modern vans will drink tank water, some vans even have water filters built into the system. Some folk bring their own portable filter system. Although you can get purifying tablets and other tank cleaning products I have never used them. I open the large inspection hatch regularly and flush out the tank from time to time.
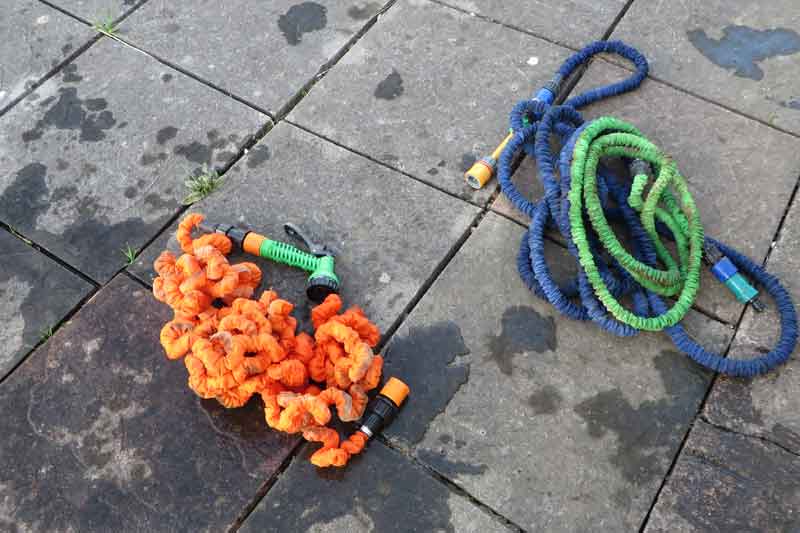
It's good practice to top up the fresh water tank on arrival at a campsite but many sites now have water taps dotted around nearby, some even have a tap per pitch. Topping up as you stay on site can be done by either moving the van, using one or two 10 ltr watering cans, having an Aqua roll container and pumping the water into the tank or by using a suitable length of hosepipe. Moving the van is hassle, an Aqua means dragging it to the nearest tap, filling it, rolling it back to the van then using a suitable 12v emersion pump to transfer the water to the tank. We use to do both methods, too much hassle and you also have to stow the Aqua tank somewhere. My preferred option to top up is using the watering cans, provided the distance to tap is not too far. OK, you might need to make a few trips back and forth but by having two 10ltr watering cans you balance the load and make less trips. The other advantage is that service areas are always a good place to stop and chat and meet new people, you can also get rid of your rubbish on the way, plus it can be good exercise!! The alternative method is to use a hosepipe, this is great if within range of the water supply, is fairly quick and easy and can also lead to interesting conversations as the hose splits, fittings come apart or you loose control of the end and it sprays everyone on the site!! There are many debates as to what type of hose is best. Garden hoses are heavy, not easy to stow away in a small space. Flat hose pipe on stowage reels are better, they take up less space but can be difficult to roll up after use. Personally we carry two or three differing lengths of a newish product called X Hose. Can also be named "Stretch hose" or "Expanding hose". Basically it is a rubber hose inside a canvas type outer cover. As water pressure builds up inside the hose the whole thing expands about three times it's original length. For example, 50 ft of hose will more or less reach a tap that is 150 ft away!! Allowing for a small drop in length as you fill the van due to the loss of full pressure they are brilliant. They are so lightweight, almost self emptying when you close the supply tap and take up much less room than any other type of hose. By having three differing lengths you use only the length needed or you join all three together and can reach almost any tap on the site! I often offer a free water filling service to those vans in range whilst I have mine out. Whatever hose you use make sure you have plenty of hose connectors, differing tap size connectors etc etc. Another tip, don't buy tap and hose connectors in motorhome / caravan dealers, B&Q and other outlets are much much cheaper for the same things.
There are some motorhomers who state that water hoses MUST be "Food Safe" as plasticides can leach out of non FS hoses. Load of twaddle, It might happen if you left the hose connected to the water supply, charged with water for hours or days in hot sunshine and then used, but most uses of hoses are for a few minutes, the water passing through the hose in seconds. If normal hoses were that dangerous they would have banned them years ago. AND guess what...Food Grade hoses cost much more!!
GAS
Not sure what gas system you have? Some vans have onboard fitted tanks that can be filled up at garages but most have stowage for a couple of gas canisters. You will have a regulator, it needs regular checking and I think needs changing every 5 years. The rubber gas pipework also needs checking and changing regularly.
Remember gas fittings are opposite to plumbing fittings so you will need to turn the connecting fitting ANTICLOCKWISE to tighten and CLOCKWISE to release. Make sure you have a gas detector in the van just in case something goes wrong.
NEVER travel any distance with the gas turned on, always shut the bottle or tank valve. (Part of your moving off check list).
If using the gas for the first time for awhile it is sometimes worth "bleeding" the system first. Easiest way is to light up one of the cooker rings for a few seconds. This is particularly useful when lighting the gas fridge or gas heater. Don't forget to turn on the gas supply at the bottle!!
Three way fridge. Gas, 240v mains and 12v AC
Most vans have this type of fridge. Best use is mains power if you have it connected. Alternative is gas, read the fridge working instructions. In most cases you turn the gas temperature valve to "ignite", switch on the igniter switch and it will light up when the gas has ignited, then adjust the temperature valve to suit your needs. The RED 12v switch works off the engine alternator so will only work when the engine is running. It will not chill the fridge but rather keep keeps it at the current temperature whilst you are driving about. Therefore it is important that you cool it first before moving off. Fridges do not like to work at all if parked at an incline, so if like us it is parked on a sloping drive at home you may need to level it out overnight before departing or put some frozen freezer packs in it for your first journey.
Packing the van
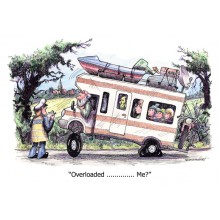
Be aware of your axle weight limits and in particular your payload limit. It is all to easy to overload the van. Having a towbar on the back is great for protection from rear end shunts, but it can also be tempting to add a tow bar fitted scooter rack ( with scooter!) Plus a cycle carrier and all on top of what's a long overhang. This can really affect the balance of the van. Know where your water tanks are, travel with limited fresh water if you can.
Tables, leisure chairs, BBQ's, TV's, bedding, clothes, food, bottles of wine and beer, etc, etc, etc, etc all add up and that's on top of all the fixtures and fittings that have been built onto that unsuspecting vehicle chassis!! Where possible, load heavy items low down and near the centre or back axle of the van. We keep our outside chairs / tables in the midsection loo when travelling, you might have a large "garage" or storage area under the fixed bed,, if you have one.
That's enough for now, I know it all sounds a lot but after awhile it will all fall into place, you will wonder what you were worrying about!!!!
The main thing is that you will enjoy your adventures.
Regards. Pete.
See Part 2 >>>>
Hi Mike.
Good to hear the info is useful. Actually It's good for me to put some of this knowledge down on paper, makes me use the brain and also will also be good for other newbies in the future.
One word of warning Mike. Make sure they do a proper damp check on her, if necessary suggest you might get an independent damp check done by others as well as theirs. The reason why I mention it now is because last year at this time I found a small amount of damp on Elle. Not surprised, after all she was 15 then. As I travelled around looking for a decent repair workshop I found nearly all the work being done by most of them was damp related. Quite a few British vans, some foreign, including Rapido. The worrying thing was they were nearly all under 6 years old!! One that was having a complete overcab rebuild was less than 2 years old. Some of the engineers were saying that because motorhomes were getting more and more popular they were being rushed through the various factories without getting the quality checks and builder skills that older vans like Elle use to get. Big dealers like Haybridge were struggling to find enough workshop facilities to cope with the repair demand.
Sorry to put a bit of a downer on it, I was shocked by what I found and would hate to find out months down the line that you had an expensive problem to deal with. Damp in a van can be very difficult to see and locate without an experienced eye and good damp detection equipment. I did not know about mine until it was spotted on a habitation check, luckily it was found quickly and it was relatively inexpensive to repair..(1000) !
Part two coming up!
OK, van is filled up with fuel, and you are raring to be off on your new adventures.
What you take is what you want and what you may need. Just be conscious of your payload and where on board you load it.
ESSENTIALS
In my view these are essentials, regardless of where you are going and time away.
Wellie Boots. Who knows when it will pour down, when river levels might rise, what muddy pathways you might walk down or even what you might need if you are able to get the van washed.
Hi Viz tabards or jackets. Needed by law in Europe, very advisable over here in case of breakdown / accident or if you are needed to help others in an emergency. Breakdown triangle, wheel levelling ramps and chocks, spare vehicle bulbs, spare fuses, small selection of tools to include gas bottle spanner, flat and phillips screwdrivers, adjustable spanner, hammer, fret saw and anything else you feel is necessary. If you have a separate "drive away" awning or a storm strap for your van awning you will need tent pegs etc and a mallet. I also carry a couple of 5 ton lightweight tow ropes just in case!
Campsites and what types to use
Both the Caravan Club, and the Caravan and Camping Clubs have good quality sites. They don't come cheap, even if you are a member but where they allow non members in then members do get a cheaper nightly deal. Depending on time of year (not all are open all year) and the popularity of location, you may be able to just turn up and get a pitch but with more and more caravans and motorhomes on the road I find that if you are planing a journey then it is worth phoning and booking in advance. Both clubs have apps for mobiles or tablets that make it easy to do. They normally have fantastic toilet blocks, showers, washing machines, dog walks and kids play areas etc. You may be asked for preferred type of pitch (grass, hardstanding, super pitch (with drainage and fresh water) Don't forget to ask for electric hookup if you want it, pitches without electric are normally cheaper). You may be asked for your van registration and / or the van length.
Some sites will allow you to find a pitch you like, pitch up then let them know which one you are on. Other sites work to the rules. You will be guided to your pitch, told to reverse so that your rear right wheel is almost touching the marker peg! Some may allow you to choose whether you want to drive on, reverse on or even go across the pitch. Parking on grass pitches is OK ( If permitted) provided they are firm and not boggy! But driving on the sacred grass when trying to access your hard standing is a criminal offence deserving imprisonment for life!!
Both clubs also authorise smaller 5 van campsites in farms, orchards, pubs etc. They are called Certified Locations by the CC and Certified Sites by the C&CC. You will find them all over the place, use the clubs guides or websites to locate them. Quite often they are off the beaten track and in the back of beyond! We love them, pick ones that suit your abilities and what you want to do in the area. Near a bus route or good foot / cycle path etc. They can be very basic, just somewhere to empty the loo and a supply point for fresh water. Some are more sophisticated with Electric hookup, and perhaps a loo and shower. They are normally cheaper than bigger sites, depends on what they have to offer and because the van numbers are restricted they are normally nice and quiet and peacefull.
Alternatively you can chose to go to a private campsite, normally bigger, brasher, can be more expensive and offer far more facilities including bars, restaurants, swimming pools, kids play areas and equipment etc etc.
Wild camping is where you try to stop overnight without using campsites. In Scotland you are legally allowed to park off road provided you do not block any roads or access, leave the place clean and tidy and don't dump your black waste. There are loads of lovely wild camping places, particularly in the Highlands and around the coastal roads. They do not like large groups of campers hogging one spot and it's normally OK to stay a maximum of one or two nights. Rest of UK is a totally different ball game. Height or width restrictors everywhere. Car parks with no overnight camping notices. You really have to look for somewhere and then decide if you feel safe. Unfortunately our bearded, unwashed travelling fraternity are to blame for that. In this country I believe it's best, and safer to use proper sites.
In Europe there is a totally different approach. They actively welcome motorhomes, most towns and many villages even provide special places to park up for a day or two. They are called Aires, ( in Germany it's Stellplatz) and again be basic with only somewhere to park overnight, some have water and waste facilities, some even showers and toilets. They are either free or very cheap or you may just put a coin in a machine for what you use. The downside is that they can get very busy and you can end up parked so close to each other. We use them occasionally but normally prefers proper campsites, and there are thousands of them, particularly for the added sense of security.
Whatever type of pitch, campsite, field or layby you are in you need to check out the following when pitching up.
First, and most important, is it reasonably level, and can I get off it if it pours down with rain! Motorhomes do not necessarily have cross country tyres so even light boggy areas may cause a problem. Beware of grass pitches where the only way out is uphill over the grass. Select your pitch carefully, I always look to see where the sun may shine if it decides to smile on us. We like the sun on the awning side of the van if at all possible.
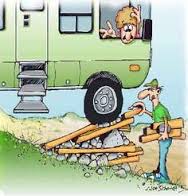
Levelling Up Added info 21 Aug 16
Firstly, only use levelling ramps if you have to. Secondly, try to park up so you use levels on your driving side, they are easier to see particularly through your open door.
If you use a fixed point on the ground that you can align the bottom of the door with you can better judge the distance you move the van, in otherwords if you know you need to move 6 inches up the ramp then find a point 6 inches along the ground when looking at the bottom of the open door. Remember if you place the same sized ramp at the same distance on all other required wheels as you did the front wheel that you can see then whatever you do at the front will be mirrored on the rest. Finally, remember you can place the ramp behind the front wheel and reverse if that makes it easier to see. Lastly, provided you have good clutch control then if you are not sure as you go up the ramp then stop, apply handbreak and get out to check.
Oh, and always go up ramps with straight wheels!
Another little trick which might help. If you have a spare ramp (guide ramp) that is more or less the same size as as the one (or two) that you are trying to use on the opposite side, then place it ALONGSIDE your front wheel that you can see, lined up same as the others, then as you start to ride up the unseen ramp(s) by looking at this guide ramp you can get a good idea of your progress, hope that makes sence!
In my opinion the van does not need to be as level as a pool table, a little tolerance can be allowed. Look at the ground, does it have any undulations that you can use to help level up. Even gravel prepared hard standings are not necessarily level front to back or side to side ( or both!). If you have a bubble level indicator or spirit level then great, if not you can get spirit level apps for your smart phone or you can place some water in a glass or you can run some into the sink and they will give you an indication if you are reasonably level or not. I have developed a good eye for the ground and sometimes it's just a case of opening the toilet door and see if it swings one way or other. Using wheel ramps will help where you do need to make adjustments.
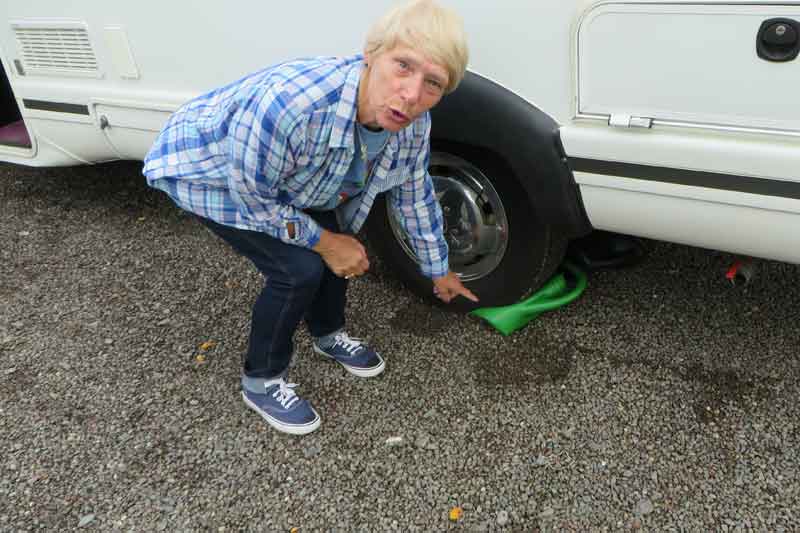
There are the big Melenco Wheel Levellers that will give you the most adjustment but they are big and storage may be a problem. Personally I have one large and three normal sized yellow Fiamma levelers and a combination of these normally is sufficient. Using a leveller is a bit of an art that needs practice.
Depending on how you need to level up you might be riding up two equally at the front, or perhaps at the back, or you might need them both under both wheels on one side, intact you might need them under both at the front AND one at the back!! You have a choice of either placing them in front of your selected wheels and driving up to get the correct height. Sometimes it's easier to place front ones to the rear of the front wheels and reversing up (You can watch your drivers side wheel through an open door much easier this way!) Remember to drive gently, no sudden movements or they may disappear across the gravel or grass or you may shoot over the top!!! (That could result in damage to the underside of the van). Use Liz to help you out. When you pace them out, either in front or behind your chosen wheels remember you might need to place them equally distant from the tyres if both wheels need to rise the same amount or one slightly nearer than the other if there is a difference in height levels required. Once you are on your levelers as required then apply hand brake AND put it in gear and if you have wheel chocks then use them. You both will be moving about in the van and you can get a bit of wheel movement.
Getting off the levellers is relatively simple but take care you only move sufficiently so that you can pick them up, don't go so far so that you drive over them with the back wheels!! Another warning, don't just release the hand break and roll off without first moving anything else you may have put under the van, I have done that a few times, last time was only a month ago and one of my 10ltr watering cans got crushed by the back wheel!! You never stop learning!!
Now having leveled up you need to plug in the power cable to the power supply. I hope you made sure you were within your available cable length when you picked that lovely sea view spot in that farmers field!!!
That will do for now, don't forget to email or ring if you have any questions.
See Part 3 >>>>
A few more odds and ends to absorb so Tips 3 coming up!!
Before moving off check list
It is important that you check these things before driving anywhere. Easy to forget something which could have disastrous results.
Check your vehicle water, brake fluid, windscreen bottle, oil and coolant levels fairly regularly, particularly on older vans.
Check your tyre pressures from time to time and keep an eye on the tyre sidewall condition particularly if the van stands for long periods of time in full sunshine.
Check all your lights, including brake lights regularly. Check everything is loaded carefully and as evenly as possible. Close and lock all internal cupboard doors. Check your charging power selector switch is switched to "engine" mode and your fridge is switched to 12v. Make sure you lock the fridge door! Lock the TV in position if it is not stowed in a cupboard, Make sure all outside hatches are closed AND locked, make sure any TV aerial or open satellite dish is retracted and most of all make sure any roof hatches are either secured or, if required (and of the right type), opened slightly to the rear so that they do not get caught by the wind. Beware of side winds on high bridges or open countryside. Ensure your awning is securely and tightly stowed away and the winding handle is inside the van, not still attached to the awning!! Remember to unplug your electric cable!! Sounds obvious but YES I have driven away from home with it still attached. No, the house stayed put but I got a nasty burn mark on the van as the cable separated from the socket!! Remember to shut off the gas supply. Vans, particularly old vans do rattle. Make sure that as far as possible you try to prevent everything rattling inside your cupboards etc. Kitchen roll paper can help, larger items like pots and pans might need a tea towel or wedging in. There are some good "anti rattle" devices on the market that can prevent plates and bowls moving about.
Right, that's about it, apart from giving your windscreen a good clean and ensuring your Satnav or maps are at hand and you have your lite bites and drinks handy, you are about ready to go. Before leaving home, check the front door is locked and the neighbours cat is not locked inside!! Nothing worse than having that unsure, dreadful feeling when you are miles down the road! If leaving a campsite, check carefully that you have left nothing behind, If your pitch is clear and tidy at least you know whatever you think you may have lost is somewhere inside the van!
A few driving tips that I have always found handy
Check your mirrors are aligned correctly. You may not have a usable interior mirror, and even if you do, like a minibus, you need to use both external mirrors all the time. Remember you are driving something that is longer, wider and in particular, higher than what you are use to. Know your measurements and have them displayed (Imperial and metric) behind your sun visor for quick reference. When driving, make sure you keep an eye out for low branches, overhanging hedges and trees. When we meet up again I will tell you a story about these hazards! Watch out for large oncoming vehicles, for other motorists who think their little mini is the size of a bus and who stop to allow you to pass but in the narrowest bit of the road! Where possible try to build up a bit of speed before ascending a hill and remember to go down a steep hill in whatever gear you would have used to climb it. Use "cadence braking" if going down a long hill, don't let your brakes overheat by keeping them applied all the way down. Use your gears regularly, don't let your revs drop too low if you can avoid it, change up early so that you maintain high revs when climbing hills. I always try to allow others to overtake me on smaller roads by pulling in when it is safe to do so BUT only if they are obviously wanting to pass and will travel quicker than me. Nothing more annoying if you do all that and they then slow you down.
Do you remember the old days of the AA man waving or saluting other members of the club? Well we do a similar thing with motorhomes and campervans! Some will wave, some may not, it's a matter of choice. I sometimes wave to oncoming campers on duel carriageways but realise they might not see me or are busy so don't wave back. No problem one way or other but it is kinda nice when you both wave to each other (even if they don't talk to you on a campsite!!)
Driving abroad
If you travel abroad remember to fit beam deflectors immediately you get off the ferry, It's the law!!
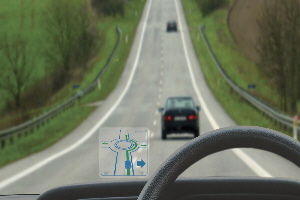
Not sure if you have any experience Mike but I love the roads over there. Lovely long, relatively straight, lightly used, reasonably repaired roads, and that's the smaller roads. (Thanks to the Romans!!) The motorways, some free to use, others, Toll roads, are brilliant but can be expensive if driving long distances, however you will get to your destinations quicker. On smaller roads beware that if the junction is unsigned then the priority is from the right. Remember also that all towns and villages have a 50kph (31mph) speed limit (if not signed at a different speed) starting from the town name sign and that that restriction normally ends as you pass the same town sign with a diagonal line through it. Most signs are universal but beware of written signs. In my "Old Soldier" days serving in Germany we had to learn by heart those written German signs, two are fixed in my memory......Farnbarnwechel...Change of traffic lane and Ausfaht......Exit!!
It would also be useful to have a sign or a note on your dashboard reminding you to "Drive On The Right", and another for when you get back in this country.
Very easy mistake to make, particularly as you pull out of garages and supermarkets etc whatever side of the channel you are on! Remember, you will need to rely on Liz to help you at times when driving a RHD vehicle abroad.
There is much more to driving abroad and if you have no experience then best to get a book on it. Different countries seem to have different standards and styles. Make sure your horn works, the Italians can't drive without using it constantly!!
Lastly for now a couple of other tips that have come through that fog of a memory of mine!!
Using your awning
When you wind out the awning only open it a couple of feet, just enough for you to be able to reach and fold down the legs. Once the legs are down, extend them a little so that the weight of the awning is supported. Move the legs out to the front then wind out more awning until you have the amount of cover needed. If you wind it fully out make sure you keep some tension in the cover. If you have a middle section support then fit it whilst your legs are shortened, makes it easier to reach and tension. If you think it might rain heavily then lower one leg compared to the length of the other, this will ensure the water rolls off quickly on one side and does not pool and cause damage to either you or the awning itself!! If you suspect wind is on the way then peg the legs down and if necessary use a storm strap, not only will it help to keep it attached to the van but it should help to stop it flapping and making a noise. Some people take their awnings down at night, me I prefer to keep it up, storing chairs and picknic table under it unless I have any doubts about the weather. If the wind is going to be strong or gusty then wind it in. Awnings WILL do serious damage to the van if you are not very careful.
Using a Remoska

A Remoska is a very useful electric cooking pan. It slow cooks brilliantly including complete chicken, potatoes, veg etc. It only uses 400w of power so is superb for use where the power supply is only 6A. I think you can get them on eBay now otherwise they can be purchased from Lakeland
And finally......Some tips about using the loo!!
When emptying the cassette, take care when removing the filler / measuring cap if cassette is really full, keep it pointing upwards or you may just get your own back!! Be careful not to drop the cap down into the abyss! After emptying, pour fresh water in and take care giving it a good shake. You may well need to rinse a few times before ending up with clear water. Take care putting the chemical in as it stains like mad and remember to add some diluting water to the cassette, not too much or you will be back emptying it before you know it!! Be careful of splasback when emptying the cassette and keep your mouth shut, just in case! Some peope wear rubber gloves, I prefere to just wash my hands properly rather than have what could be contaminated gloves hanging about.
And lastly......and this is a little gem........ Before using the loo for a "number two", open the trap and lay some toilet paper across the bowl, then when you "lighten your load" your offering will end up being wrapped up in a nice little parcel before plunging into the depths, leaving your toilet bowl nice and clean.....!! Well that's the theory anyway!!
A few further tips and ideas have come to me since the last email. No particular order...
When starting out on a long trip boil a Vacuum flask of water before you leave. This makes having a cuppa much easier if you stop on route, no gas to turn on and waiting for water to boil.
The Camping and Caravanning club offer an old codgers reduced nightly rate scheme once you have been members for awhile. Check out the website.
Purchase and carry some Grip Tracks. These are lengths of plastic strips for placing under wheels to help with traction in soggy, wet or muddy areas should you need them. You can make your own out of suitable materials such as carpet strips...(Wilton or Axminster are best!!). Make sure you have lengths of twine to attach them somewhere on the van so that they are pulled just behind the driving wheels when you get going, that way you won't need to stop until you are on a firm surface or have to walk all the way back to pick them up.
Leave fridge door ajar when not in use. Fridges get musty and moldy if closed up and not powered up.
Carry a small foldable step with you, it has loads of uses....Small table to have in front middle of cab to carry phone, map, essentials. (Use non slip mat surface), Useful for seeing into and reaching into high cupboards, or rooflights if you are a short arse!, Useful fo standing on to clean outside of windscreen etc. It can be a spare coffee table in the awning or a spare seat, or a foot rest and takes up very little room if you get the fold flat / heavy duty type.
Tuning digital TV and using Satelite system
I'm sure you realise that these days of modern digital terrestrial signals are very limited so you may well have to retune your TV on arrival at a new site. If you can't get a digital signal using your own on board aerial you might need to use a directional aerial mounted on a pole or use a connecting cable to a socket if that is provided by the camp site. If you rely on your self tuning Satellite dish mounted on the top of the van then ensure you pick a pitch that gives you clear line of site to the Satellite transmitter, SSE direction and low on the horizon. I have spent hours watching ( and trying to help) friends and other motorhomes who spend hours trying to lock on to a satellite signal, sometimes changing pitch three or four times ( or more) in their desperation!! Sometimes it pays to have a cheap Lidl portable satellite dish and tuner that can be moved about without moving the whole van!!
And that's about it - what a great start to the steep learning curve we all go through at the begining of our motorhome journey - Thank you Old Soldier 
 (share) button at the bottom of your screen,
 ( Add to Home screen ).